

How To Decorate Crochet Hats
How to Design your OWN Custom Crochet Lid
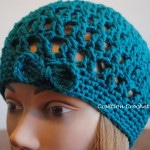
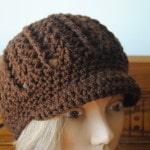
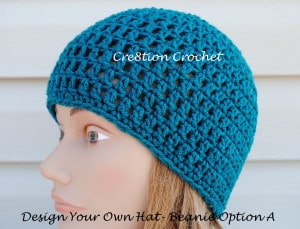
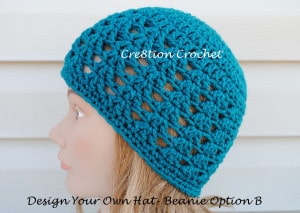
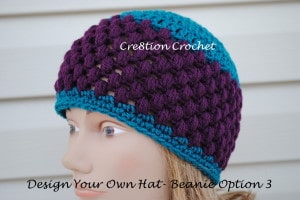
I will teach yous the basics to design your own hat or to customize whatsoever hat pattern, and I will work with you lot to create a hat of your own. The hat we will exist working on volition be a basic beanie, though you will have three different options for style. Y'all can selection from 1 of the 3 finished beanies below.
We are going to focus on women's hat sizes but the data can be easily applied to any hat sizing/designing bug. Nosotros will also discuss how you can make your hats more professional looking past hiding any seams and having an invisible finishing edge.
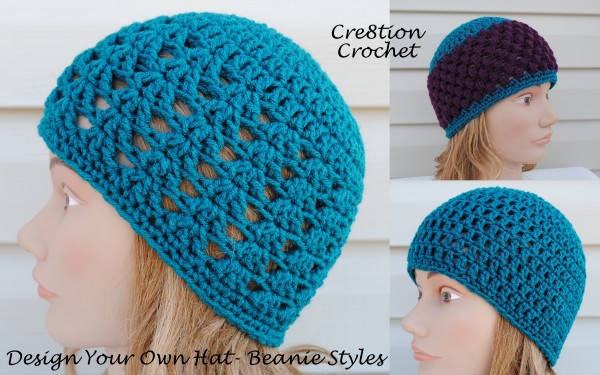
Once yous are comfy with a bones beanie you lot can check out these other style hats.
First, permit united states discuss how to determine the size hat you lot will need. There are some full general size dimensions for head sizes by age. The general measurement for circumference of a woman's head is 22 inches. Y'all will blueprint your finished hat to be slightly smaller, approximately 18". This measurement won't be correct for everyone, some women take smaller heads and some have larger heads, only the hat will stretch if needed but does not need to exist stretched to fit either. If you lot practise not know the head size of whom the hat will exist made for y'all can follow a chart. Come across chart below for approximate head sizes.
Approximate Caput Circumference per Age Group
Premie ten-12"
NB or 0-3mo 13-14"
iii-6mo 15-xvi"
6-12mo 17-19"
ane-2yo 18-20"
2-3yo nineteen-21"
4-8yo 20-22"
eight+ 21-22"
adult women 22-23"
developed men 23-24"
Now here is where the math comes in. We all call up that pi = 3.14, right? Well what does that hateful? Pi is a Greek number or unit of measurement, which is the circumference of any circle, divided by its diameter. Information technology doesn't have an exact value but for all practical purposes you tin use the value of iii.14.
You lot will need to make each chapeau slightly smaller (2-3") than the full circumference of the caput for whom it is existence made. If y'all happen to have exact measurements it is great simply if not y'all tin can follow the chart above.
But how will I know how big to make the chapeau without making the whole thing, just to realize it is too big or also small. Well that, my friends, is VERY easy.
Every hat design, made in the round, starts with a certain number of increasing rounds. These are the rounds where ii or more stitches are placed in specific stitches from the previous round. In guild for hats to take a rounded shape the stitches must exist increased gradually.
For the all-time results I have found that each increase circular should increment by the total amount of stitches in the first round. For instance if your starting time round starts with 10 stitches then your 2d round should increment by ten stitches, giving you lot a total of 20 stitches. Your third circular should also increase by x more stitches, giving you a total of thirty stitches. (If you begin with 12 stitches your hat should increase this manner, 12 > 24> 36, etc.)
I take also constitute that when you starting hats in unmarried crochet, x is the optimum number of get-go stitches. If you kickoff your hat in double crochet 12 stitches is a dandy place to outset. If you are using half double crochet then you can do either 10 or 12, but I prefer to showtime with 10 stitches. More advanced stitches such as puff stitches can exist done in either ten or 12 depending on the particular sew together.
The total amount of increasing rounds make up what is referred to as a "flat circle". This is what yous volition measure in lodge to determine the finished hat circumference. Y'all can be every bit exact as you lot want with this measurement. In order to determine the diameter needed for your flat circumvolve you lot volition separate the total hat size circumference (approximately two" smaller than the head circumference.
Example: My caput measures exactly 22". So I would design my hat to be 20" in circumference. In order to determine what my flat circle measurement needs to be I would divide 20 by 3.fourteen (pi).
20 divided by three.xiv = six.369426751592357
Well I am certainly not going to get that close, only I tin circular that to the nearest easily obtainable measurement in inches- 6.25". I could safely brand my apartment circumvolve anywhere from 6.0-half-dozen.75" and so let'due south see how it goes.
In club to simplify this step for you I have designed the following chart giving you gauge flat circle measurements by age group. *I take constitute many charts that have exact flat circle measurements but I have found by experience that the results will be far also big. I take made hats for every historic period group following numerous charts out there and compared them to the actual size required for a good fit. I have since come up upwardly with the following measurements which are what I use. I become perfect fitting hats every fourth dimension. The only time these sizes could be increased would be if y'all are using an extremely tight sew together, or a type of yarn that will not offer much stretch. Near natural and constructed fibers take a lot of give.
Approximate Flat Circle Measurement per Age Grouping
Premie two.0-2.75"
0-3mo 2.75-iii.50"
3-6mo 3.5-4.25"
6-12mo 4.25-5.0"
ane-2yo four.five-v.25"
2-3yo iv.75-5.50"
iv-8yo 5.0-5.75"
8+ 5.fifty-six.25"
adult women 6.0-6.75"
adult men 6.25-vii.0"
Now I would begin to make my lid. Using whatsoever yarn I choose with whatever claw size information technology recommends. I would increment in rounds until I reached equally close as possible to my desired measurement.
So let's put all of this theory into practical use:
I am going to utilise Crimson Heart Classic worsted weight yarn using the recommended claw size, 5.5mm (I).
All abbreviations and stitches used in the following patterns can be establish here:
For more information on how to increase rounds gradually, you can read this article
There are three ways to start a hat in the circular, you can either make a magic circle/band, which seems difficult but is really quite easy once you know how. The magic ring will also give you a much more professional finished wait. Y'all can read this post to acquire how to create a magic circle/ring (link includes video tutorial as well).
Or you can use the chain method. Chain 3-4 (depending on how tight you chain, experiment to come across what works best for yous) and sideslip stitch into the first chain to course a ring. Chain ane (this will not count as your showtime sew together) and and so place the required amount and blazon of stitches into the middle of the ring. Join circular with slip stitch (into the first stitch you crocheted, not the 1st sc)
The other method is to chain 2, and and so place the desired amount of stitches in the first chain. However, information technology is sometimes difficult to get the required (x-12) stitches into the outset chain.
I volition be using my seamless method for this pattern, for more than information or if you have any confusion please cheque out this post. My Seamless Methods (post also includes video tutorial)
Basic Beanie Blueprint
Round1: Mc/r (or chain3-4 circumvolve) with 12dc . Sl st into the back loop only of the 1st dc to join circular. (1.75")
Round ii: In this round you are going to increase in every st. Ch1. Skip side by side st. 2dc into the next st and in every st around, (leaving ane empty st at the beginning of round). Concluding 2dc volition exist stitched into the st previously left empty. Sl st into the 1st dc to join circular. <24> (3.0")
Circular 3:In this round you are going to increment in every other st. Ch1. Skip adjacent st. 2dc in the side by side st . *1dc in next st. 2dc in adjacent st. Echo from * around (leaving 1 empty st at showtime of round). Last dc will be stitched into the st previously left empty. Sl st into the back loop merely of the 1st dc to join circular. <36> (4.25")
Round 4:In this round yous are going to increase in every 3rd st. Ch1. Skip next st. 2c in the next st. *1dc in next st. 1dc in next st. 2dc in next st. Echo from * around (leaving ane empty st at commencement of round). Last dc will be stitched into the st previously left empty. Sl st into the dorsum loop just of the 1st dc to join round. <48> (5.five")
Round 5:In this circular you are going to increase in every eighth st. (this will increase the round by ½ of the amount of stitches previously added per circular (half-dozen instead of 12).Ch1. Skip next st. 2dc in the next st. *1dc in each of the next 7sts. 2dc in the next st. Repeat from * around. Last dc volition be stitched into the st previously left empty. Sl st into the back loop only of the 1st dc to join round. <54> (6.five"). Circumvolve won't be exactly flat at this point since we merely increased by 6 stitches in this round, just it will still be where you measure out since information technology is your final increasing round.
This is the measurement exactly in the heart of the guidelines and where I like to ideally fall!
Go along in listen that your measurements will probably non be exactly the aforementioned as mine, depending on how tight or loose you crochet, but y'all will want to end up somewhere between half-dozen.25-6.75" at this footstep. If you are grossly off yous volition need to change your hook size. Go upwards ½ to one claw size if you are measuring smaller than half-dozen.25" or go downwards ½-1 hook size is you are measuring larger than half-dozen.75".
Decide which pattern you lot would adopt to finish with from the choices below
Finish Option A
Round 6: Ch1. Skip side by side st. 1dc into the next st and in every st around. (leaving one empty st at the beginning of circular). Last 1dc volition be stitched into the st previously left empty. Sl st into the dorsum loop only of the 1st dc to join round. <54>
Round vii-thirteen: Repeat circular 7 until you achieve your desired height. I fabricated my hat to vii.5" long, which was achieved with 13 rounds total (including increasing rounds)
Round 14: 1sc into the offset st (exercise chain or skip whatsoever stitches). 1sc in every st effectually. do not sl st to complete round, instead follow my instructions for the invisible finish. <54>.
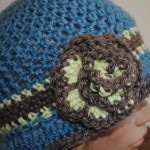
Weave in get-go tail. Embellish hat as you lot like.
You can find some smashing flower embellishments in The Flower Repository.
Hither is where we need to hash out length. There are some guidelines for length but it is really more of a personal preference to decide where the hat will lie when finished. I do not like my hats to rest likewise far down my forehead or cervix, as I observe information technology distracting. Optimal length for me is seven.5" long (measured from eye/pigsty to bottom edge of hat. Some people, however similar their hats to be longer, their hair may be very full, they may non like to where their hats snug or they may like them to come downward low on their forehead or the nape of their neck. Below are some guidelines for how to decide length of a hat. For now nosotros will go along with the blueprint which I volition make to the length I adopt. If you would similar your hat to exist longer simply add 1 or 2 rows as necessary.
General Guidelines for Hat Length by Age Group
Premie 2.5-3" (I always recommend adding a one-one.5" skirt to premie hats)
0-3mo 4.0-4.5"
three-6mo 4.5-5.0"
6-12mo 5.0-5.v
one-2yo 5.v-6.0"
2-3yo 6.0-half dozen.5"
4-8yo 6.5-7.0"
8+ 7.0-vii.v"
adult women 7.5-eight.5"
adult men viii.v-9.five"
If you want to add a fold up brim add 3-four" to total height (1-1.v" for premie sizes). If y'all desire to add a floppy/sunhat or cloche way skirt subtract 0.5" from the total measurement (non including the skirt).
Finish Option B
Round 6: Ch1. Skip next st. 1dc into the adjacent st and in every st effectually. (leaving one empty st at the beginning of circular). Final dc will be stitched into the st previously left empty. Sl st into the both loops of the 1st dc to join round. <54>
Round seven: Ch2 and 2dc into the same space. *Skip 2sts and 3dc in third st. Repeat from * effectually. Sl st into the top of the ch2 (both loops) to join round. (make sure you are not sl st'ing into the top of the 1st dc). <xviii clusters of 3dc>
Round viii: Sl st into the next st. Ch2 and 2dc into the same space. *Skip 2sts and 3dc in third st. Repeat from * around. Sl st into the summit of the ch2 (bo th loops) to bring together round. <18 clusters of 3dc or 54dc>
Round nine-12: Echo Round 8 until y'all attain approx. ¾" less than desired length is reached. I made this stride to 6.75" long, which was achieved with 6 rows of dc and 6 rows of 3dc clusters.
Round xiii: 1sc into the first st (do chain or skip any stitches). 1sc in every st around. sl st into 1st sc to join round.
Round 14: Echo round 10 <54> practice not sl st to complete circular, instead follow my instructions for the invisible cease. <54> Full tiptop 7.v"
Weave in beginning tail. Embellish chapeau as you like.
Y'all can find some keen flower embellishments in The Flower Repository
Finish Option C
Round 6: Ch1. Skip next st. 1hdc into the next st and in every st effectually. (leaving one empty st at the beginning of round). Last 1dc will exist stitched into the st previously left empty. Sl st into the both loops of the 1st dc to join circular (modify color if desired) <54>
Round 7: Ch1. 1ps in same st. Ch1. Skip side by side st. *1ps in adjacent st. Ch1. Skip adjacent st. Repeat from * around. Sl st into the pinnacle of the 1st ps to join round.
Round viii: Ch1. 1ps into same space (behind the side by side ps of the previous circular). Ch1. *1ps in next space (between ps' of previous round). Ch1. Repeat from * around. Sl st into the top of the 1st ps to join round.
Rounds 9-xiv: Echo round viii until you reach approx. ¾" less than desired length is reached. I made this pace to 6.75" long, which was achieved with six rows of dc (including increasing rounds) and 8 rounds of ps.
Round 15: *1sc into the first st. 1sc in next sp. (do chain or skip whatever stitches). Repeat from * to join round. Sl st into 1st ps to join round.
Circular sixteen: 1sc in every st around. Practice non sl st to complete round, instead follow my instructions for the invisible terminate. <54> Total height vii.5"
Weave in beginning tail. Embellish hat as you like.
You can find some great flower embellishments in The Flower Repository.
Additional information
How to measure for customized caput circumference:
A tape mensurate is placed on the forehead, in a higher place the eyebrows and slightly above the ears, and passed around the head, ensuring that the widest part of the head is included.
How to measure out for customized desired summit:
Place a record measure out on your brow where you lot want the hat to lay. Pass tape mensurate over the back of your head and measure out to where you lot would like the chapeau to lay on the nape of your neck or back of your caput. Accept that total measurement and divide in half. That is how long y'all want to make your hat.
Keep in mind that dissimilar stitches will require different dimensions. Y'all can increase specialty stitches such as a puff stitch, shell stitch, X sew together, etc. Yet, the flat circle sizing will be different due to the fact that those stiches are larger and have far more give. I recommend using a standard sew in the increasing rounds and to increase 1-i.5" smaller than typical for each historic period group.
Different style hats too require dissimilar fits. Slouch hats for example do non fall into any sizing categories as they are made to be very loose or very alpine. The ring size however will follow the measurements more closely. (To measure out circumference using the band simply mensurate the band at its widest indicate and double it. That will give yous an judge circumference). Hipster style hats are worn shorter but are typically wider. Cloches are tighter at the head to really accentuate that bell shape. As you lot pattern more y'all volition larn how to modify the size requirements for unlike styles and stitches. Do not be agape to experiment, you can e'er rip it out and beginning over… that is how you will learn.
I promise you enjoyed learning how to design your own hat patterns and making your bones beanie. If you lot accept any questions please feel gratuitous to annotate bellow or through email at [electronic mail protected]
Thank you lot for following along and as always…
Happy Hookin'

How To Decorate Crochet Hats,
Source: https://cre8tioncrochet.com/how-to-design-your-own-custom-crochet-hat/
Posted by: harrisonvoiled.blogspot.com
0 Response to "How To Decorate Crochet Hats"
Post a Comment