

How To Make Decorative Coils With Rope
It has been a few months betwixt posts on my blog. Partly due to moving house and not having a proper sewing space just yet. But I'g back today with a tutorial for some coasters!

These coiled rope coasters were inspired by the work of Gemma Patford, an Australian maker known for her rope baskets and bags. These make a overnice afternoon or weekend project equally they are relatively quick and easy to whip upward.
The supplies are pretty affordable and you may already take some of them at dwelling. All I needed to get was the rope, which I bought from the hardware store. You lot tin can probably find it online as well.
This tutorial is for small coasters, merely with these basic techniques you tin can create larger projects such as place mats, baskets and numberless! Without farther ado, on to the tutorial:
Materials

- Cotton wool rope (I used 5mm thick rope)
- Acrylic paints
- Paintbrush
- Scissors
- Tape
- Sewing machine with zig-zag stitch
- Thread
Instructions

Cut rope into lengths of 170cm (approx 5'6″).
Tip: record the rope where you want to cut to avoid fraying.

Paint the rope with the acrylic paint. Allow the paint fully dry before moving on to the next footstep. Painting the rope is optional if y'all just want patently natural cotton fiber coloured coasters.
Tip: Make sure to 'flip' the rope over and paint spots all around the rope. If you desire a subtle amount of color, spread out your paint spots. If y'all desire more colour in your coasters, paint the spots closer together.

Head to the sewing machine. Set the machine to a wide zig-zag run up. Advisedly remove the tape from one cease of the rope and ringlet it into a tight circumvolve about 2cm (ane″) in diameter and place under the sewing machine presser foot. Zig-zag stitch and back stitch a few times to secure the small coil. It should then look like the photo above. Yous can remove it from the sewing machine, cut the excess threads and bank check information technology is secure before moving on to the adjacent step.
Tip: Y'all may desire to test out your zig-zag sew together on scrap fabric to check you take your desired width before sewing your rope.

Place the whorl back under the presser foot. The free end of rope should exist on the right of the curlicue. Start sewing slowly in zig-zag run up while coiling the rope around clockwise. Ensure you are catching the zig-zag sew on both the free rope on the right and the rope of your growing coil on the left.
Tip: Go irksome. When y'all need to rotate the roll, have the needle down (as in the motion picture above) and lift the presser foot, then reposition the rope. Then place the presser foot dorsum downwards and continue sewing.

As you go to the terminate of the rope make certain you accept v-7cm (2-iii″) left. Remove the tape from the end and loop it back on itself then it is sandwiched between. Continue stitching the secure the finish. Back stitch to secure the stitches. Trim excess threads.
Tip: It may assistance to employ a tool to push the rope tightly together when stitching the loop. I used my seam ripper.

And there y'all take it, you've fabricated your own coiled rope coaster!

Design ideas
- Use a contrasting thread color as an accent. I chose white thread so the paint colours would stand out.
- Different means to finish the ends: with a fabric/leather tab; with a knot and fraying the rope for a tassel effect.
- Paint your coasters later sewing them instead of earlier. You can paint your own design or do colour blocking.
- Using fabric dye for ombre effect – either earlier or subsequently sewing the rope.
- Make bigger coils for placemats or trivets!


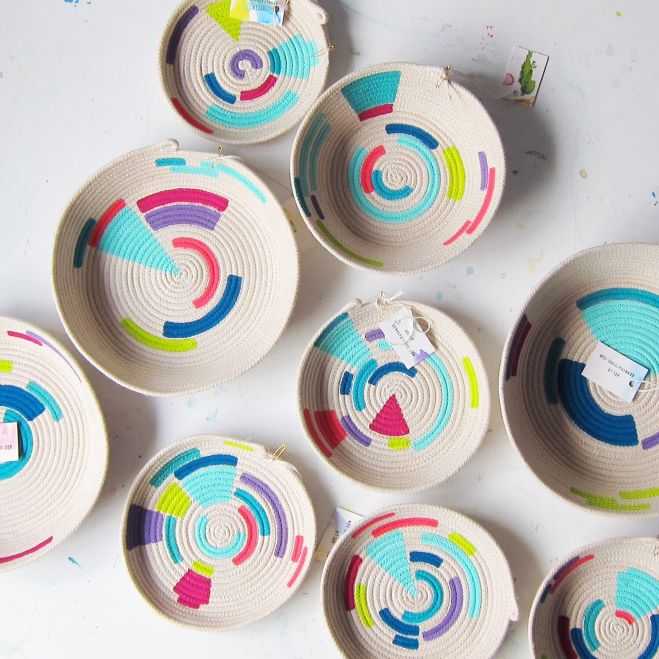
Image credits: 1, 2, 3, 4
Source: https://oneandtwentybuttonholes.wordpress.com/2019/10/26/diy-coiled-rope-coasters/
Posted by: harrisonvoiled.blogspot.com
0 Response to "How To Make Decorative Coils With Rope"
Post a Comment